Yesterday I had a couple hours to kill and decided to try out a project I’ve been meaning to explore for a long time: training my own AI image model so I can generate pictures of myself that look like this:
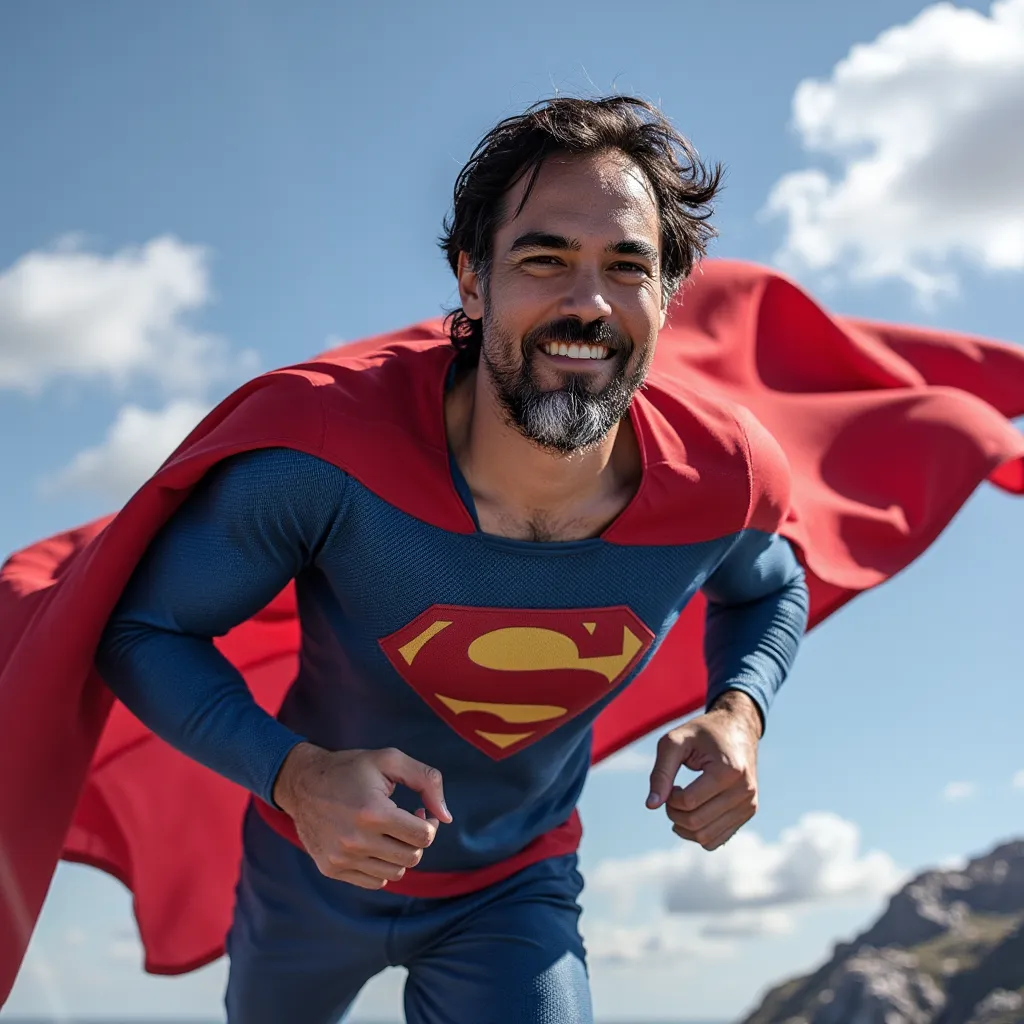
Me as Superman
I had a few reasons for wanting to do this:
- It sounded fun.
- I thought my kids would like playing with it.
- I’d learn more about the innards of custom models / deeper AI stuff that I’ve only ever scratched the surface of.
- It might be an interesting future add-on to my SaaS / AI starter project, SaaS Pegasus.
What surprised me was just how easy it is to do something like this now. I halfheartedly tried to do this 12 or 18 months ago and quickly gave up in frustration. This time, I built my model and was making pictures like the above in under 2 hours, coming in with basically zero knowledge. Most of that time was just wrapping my head around the right tools to use.
In this post I’ll quickly summarize what I did and how you can do it yourself.
Choosing a model / training pattern
The main things you need to make these models are:
- A base model.
- A training/fine-tuning technique.
- A training dataset—basically some pictures of yourself or your subject.
If you ask ChatGPT, Claude or even DeepSeek about how to do this they will probably recommend using Stable Diffusion for this, but I remembered Pieter Levels, who makes PhotoAI, talking about a model called Flux that performs much better, so I decided to use that as my base model. Flux has an open-source/open-weight model that is not state of the art, but definitely good enough for my purposes.
For a training technique, there are a bunch, but the one that seems to be recommended today is LoRA (Low-Rank Adaptation). I learned exactly as much about LoRA as I needed to, but conceptually you basically train a tiny part of the model and associate it with a magic, uncommon word that you invent (e.g. “czue”). Then when you prompt the model to create the invented word it is heavily influenced by that training data. This ends up being much faster and more efficient than fine-tuning the whole model, and works well! Don’t ask me any follow-up questions about this, because that is the extent of what I learned.
Create a training set
Once you have your model you need a training set, which is basically a bunch of pictures of the thing you want the model to learn. For this part I just grabbed 10-15 random photos of myself with different expressions / scenes / lighting / angles. The more diverse the dataset the better. Also I think it’s important that you’re the only person in the photos (I didn’t try any with more than one person).
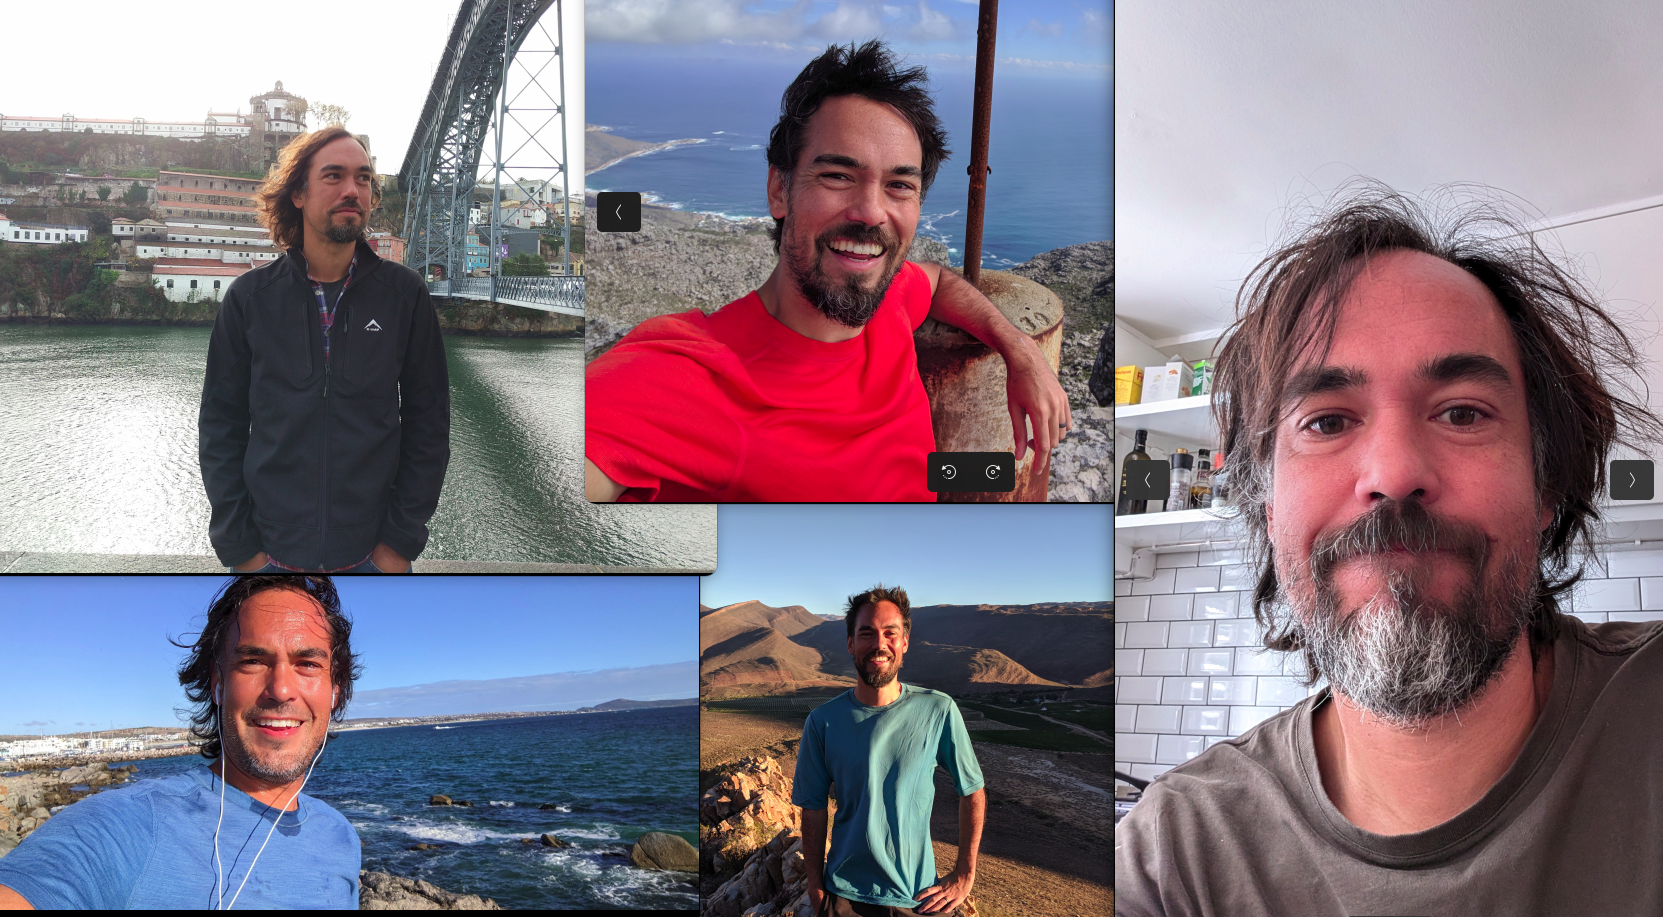
Some of the photos I used for my training set. I tried to capture different angles, lighting, hairstyles, and so on, though sadly most of the photos I have are selfies.
As part of the training, the model needs text descriptions for the model to learn from, and these should, I think, include your magic word. So, for example, you’d upload a picture of yourself on the beach and—if your magic word was czue—you’d then add a text description that said “a photo of czue on the beach, wearing a blue shirt.”
That said—you don’t actually have to label your images yourself, because the tools today will auto-generate these captions for you with LLMs. So you might read somewhere this is necessary, but you can skip it, since it gets handled for you.
Training your model
At first I thought it’d be fun to train the model on my laptop. But I quickly ruled that out because I don’t have anything close to the hardware necessary (GPUs and lots of RAM). Then I thought it might be fun to figure out how to run the code on some beefy GPU cloud server, but I quickly bailed on that idea too, and landed on Replicate.
Replicate is basically GPU-rentals-as-a-service. But they also have a rich ecosystem of pre-built stuff that you can spin up and run instantly. So rather than write your own training code and install all the dependencies and such, you grab someone else’s “recipe” and just plug in the parameters you need.
For this use case, I learned that the easiest way to train the flux model with LoRA is with the ostris/flux-dev-lora-trainer recipe. You need to create a Replicate account and set up billing, and then you can enter the parameters you need on that page which correspond to how you’re going to train the model.
The most important settings:
- input_images: The zip file of your training photos.
- trigger_word: The magic word you’ll use for your LoRA trigger. This should be something unusual. I chose “czue”.
- hf_repo_id and hf_token: Hugging face repository and API key (see below).
- autocaption_prefix: I’m not sure if this is necessary, but I made this “A photo of czue,” matching my trigger word. This will get prepended to all the image captions generated by the LLM that I mentioned above.
Now would probably be a good time to mention that there are a bunch of YouTube videos that walk through this process in detail. This is the one I mostly followed. If you want to know more about how to fill in the training parameters you can watch that, though the above covers the essentials.
After filling in everything you click “Create Training” and you’re off! Replicate shows you progress as it trains your model and will finish in about 20 minutes. You’re done training!
Saving your model to Hugging Face
Hugging Face is basically just a place to store and share models—kind of like Github, but for AI. Using it is optional, because Replicate also saves your model somewhere after training it, but Hugging Face makes it easier to access and integrate your model with other tools later. Plus it’s free and easy to set up, so I used it.
I created an account and empty model on hugging face, and then plugged it in under hf_repo_id in the training form above.
You also need an access token, which you can get from your hugging face settings page,
and then put under hf_token.
If you do this step, then when your model is done training, your hugging face repo will be populated with your trained model. This is basically a giant (180Mb) file called “lora.safetensors”. In all worlds, the model will also be available under the “trainings” tab in Replicate.
Using your model to make pictures
Ok, payoff time! The last step is to do some inference. In other words, give our model some captions and have it make pictures for us.
Again, I briefly explored running this myself and again I quickly bailed and used Replicate. In this case you can use the lucataco/flux-dev-lora recipe for it. The key modification you need to make is the hf_lora field, which should either be your hugging face repo ID (it must be public for this to work) or a link to your trained model on Replicate (a “trained_model.tar” file from “Trainings” –> “[your training]” –> “Download Weights”).
Then put in a prompt, being sure to include your secret word for the person you trained on:
A photo of czue, surfing
Press “Run”, and you should get a picture of yourself (or someone who looks at least plausibly like you) surfing:
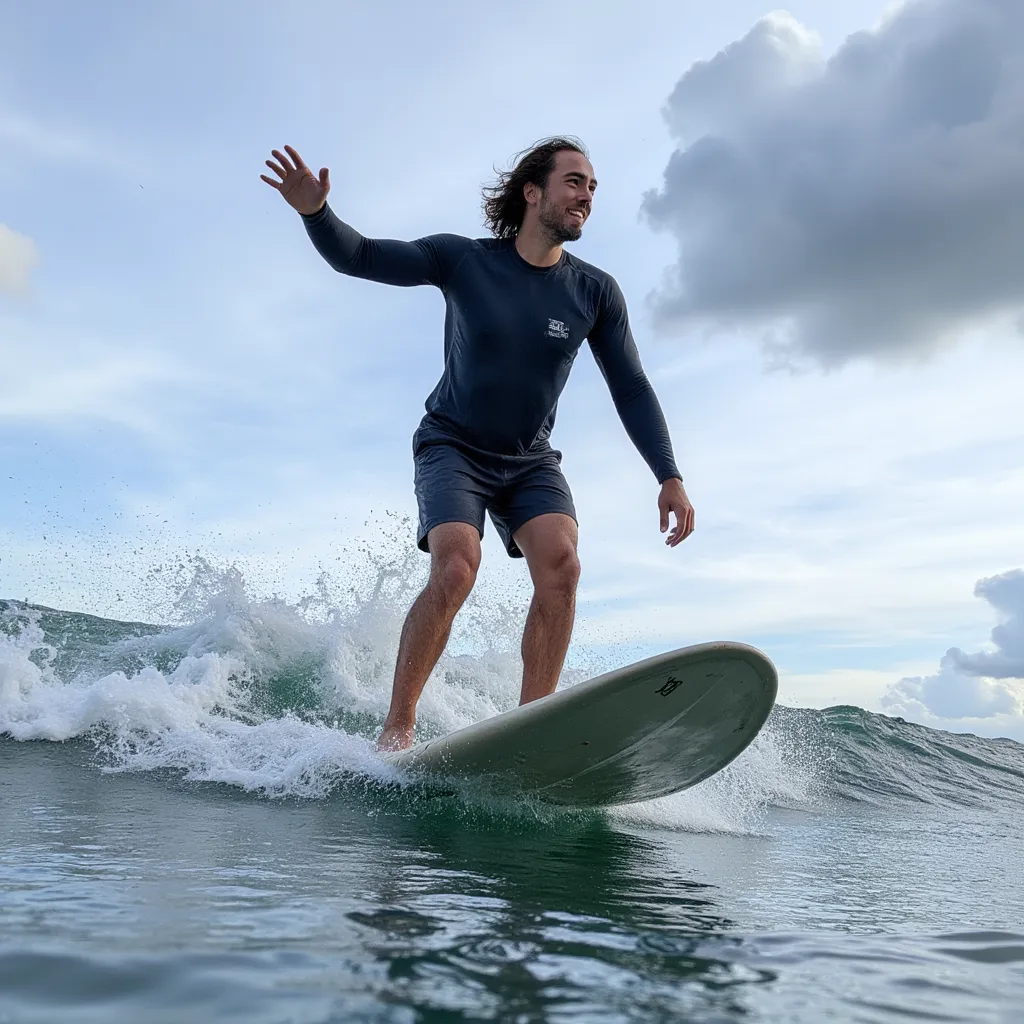
Lekker!
Running the model programmatically
You can also run your model programmatically via the API. This is much faster for experimenting with different prompts, saving images to your computer and so on.
Here’s a simple Python script that demonstrates the process.
I’ve also published it to Github, and may make future updates there.
Most of the code is just plumbing around arguments and filenames, and the actual API call is a single line (replicate.run(...)).
# /// script
# requires-python = ">=3.12"
# dependencies = [
#     "replicate",
# ]
# ///
import argparse
import os
import re
import replicate
import uuid

DEFAULT_MODEL = "czue/me-v1"
DEFAULT_COUNT = 1


def get_input(prompt, model=DEFAULT_MODEL, count=DEFAULT_COUNT):
    return {
        "prompt": prompt,
        "hf_lora": model,
        "num_outputs": count
    }


def main():
    parser = argparse.ArgumentParser()
    parser.add_argument("prompt", help="Prompt for the photo")
    parser.add_argument("--model", default=DEFAULT_MODEL,
                      help="Model to use (default: %(default)s)")
    parser.add_argument("--count", default=DEFAULT_COUNT,
                      help="Number of photos to generate (default: %(default)s)", type=int)
    args = parser.parse_args()

    input = get_input(args.prompt, args.model, args.count)
    output = replicate.run(
        "lucataco/flux-dev-lora:091495765fa5ef2725a175a57b276ec30dc9d39c22d30410f2ede68a3eab66b3",
        input=input
    )

    output_dir = "output"
    os.makedirs(output_dir, exist_ok=True)

    # Use the last few words of the prompt, remove special characters and convert to lowercase for the filename
    prompt_slug = "-".join(args.prompt.split(" ")[-3:])
    prompt_slug = re.sub(r'[^a-zA-Z0-9\-]', '', prompt_slug).lower()

    for index, item in enumerate(output):
        file_id = uuid.uuid4().hex[:5]  # append a random hash to avoid conflicts
        output_path = os.path.join(output_dir, f"{prompt_slug}-{file_id}.webp")
        with open(output_path, "wb") as file:
            file.write(item.read())
            print(f"Saved photo {output_path}")


if __name__ == "__main__":
    main()
A Python script to run prompts against your model. Also available on Github.
You car run this with, e.g.:
uv run main.py "a photo of czue, a 40 year old man, writing a blog post" \
 --model="czue/me-v1" \
 --count=4
Results
Overall I’ve found results have been…mixed? Sometimes the model produces something that looks quite similar to the trained person, and sometimes it only has a mild resemblance.
One trick I’ve found is that appending some extra hints about the person seems to help (e.g. “a 40 year old man” for me, or “a six year old boy” for my son). Without this prompt it was often turning my boys into girls, and making other amusing mistakes.
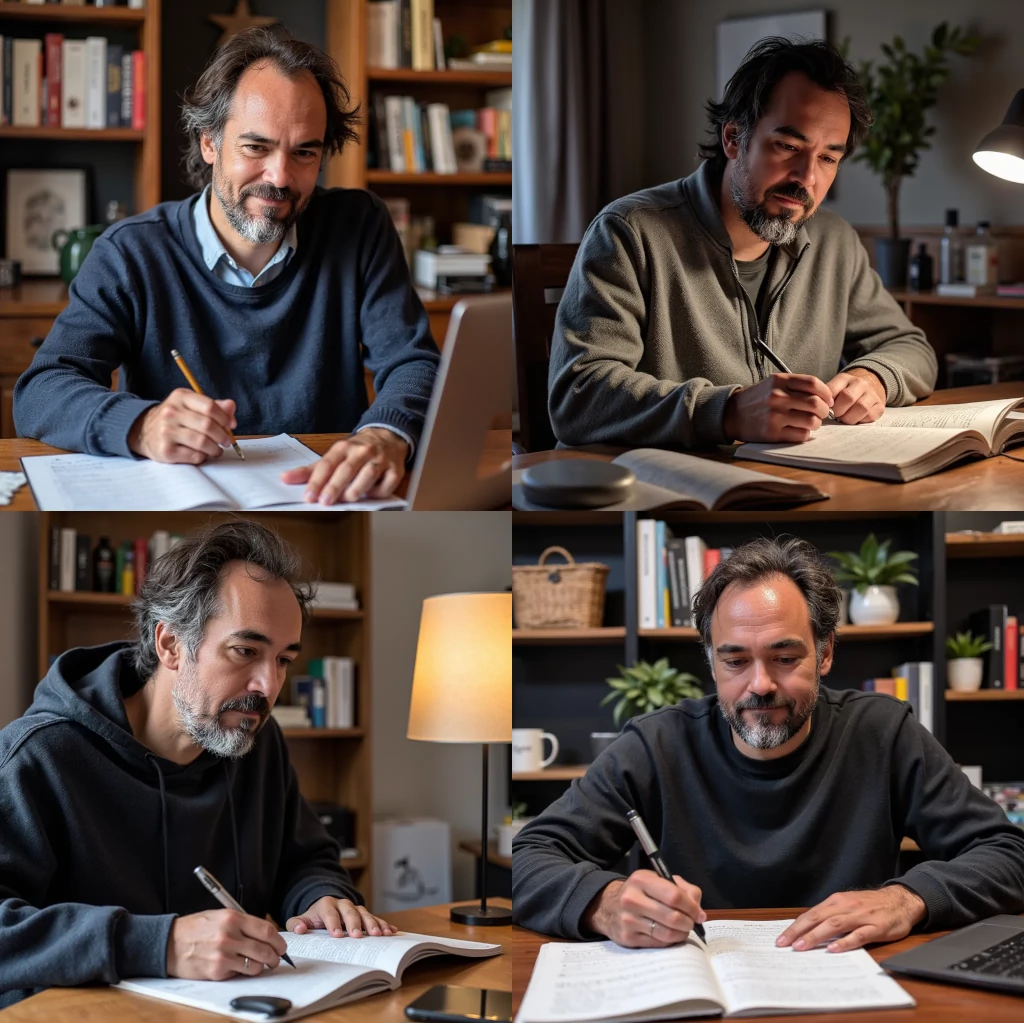
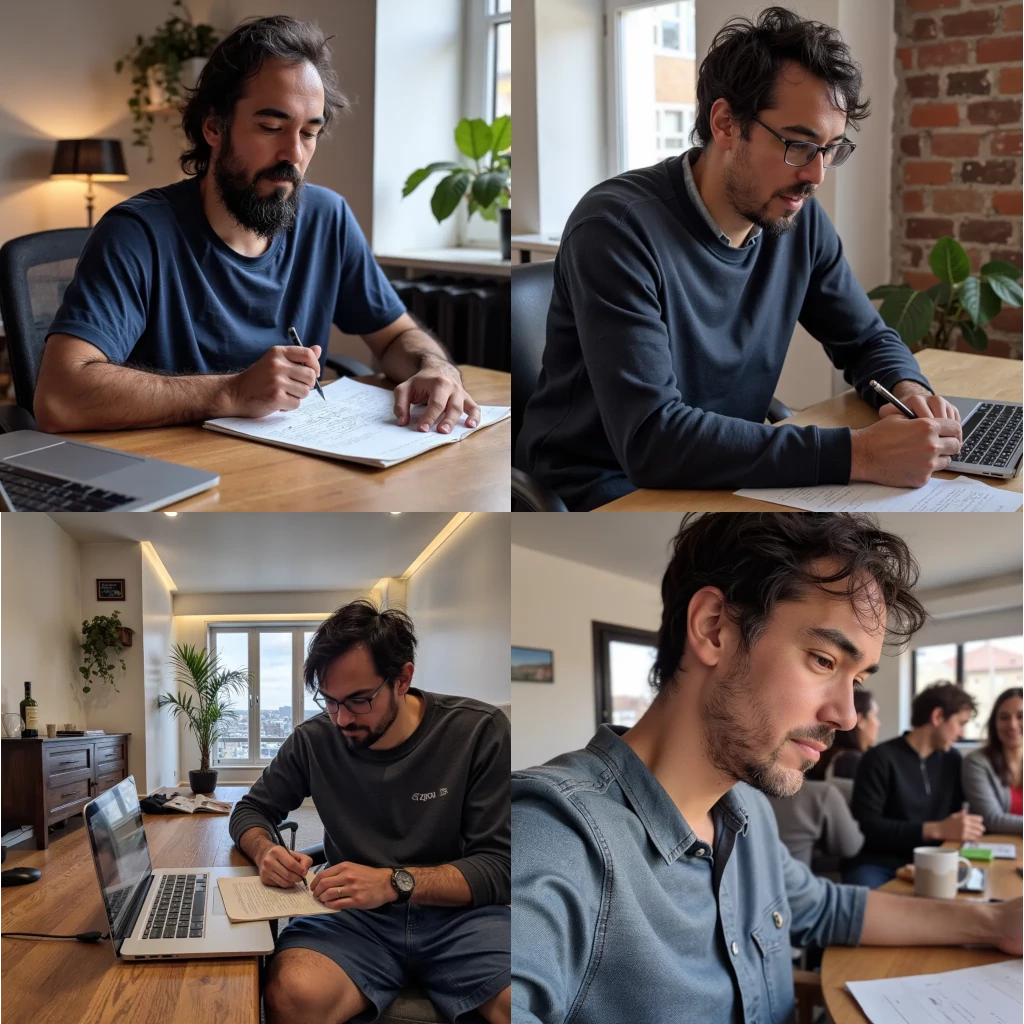
Here are some example results for the prompt “a photo of czue, a 40 year old man, writing a blog post”:
Versus “a photo of czue writing a blog post”:
Neither set is great but the first set is much closer to what I actually look like, and more consistent with itself. The second set is kind of all over the place.
Another thing I noticed is that it seems to break down if you try to include other people. For example, when I tried to put myself next to Barack Obama it kind of merged some of my features into his face and vice versa.

I’m sure you can get better results by playing around with prompting. I’ve only really scratched the surface of experimentation.
But, overall, the results have been good enough that both me and my kids have had fun making pictures of ourselves in different scenarios—which was my primary goal.
Win!
Costs
This isn’t free, but it’s also not expensive.
I trained three models (one on myself and one on each of my kids). The training costs were ~$2.50 per model. Then generating images is about $.03 / image, or 30 for a dollar.
I ended up spending just shy under $10 on the whole little experiment. Not bad!
Overall, this was a fun little exercise and I was happily surprised by how easy and cheap the whole process was. If you’ve wanted to do this yoursef, but been intimidated by all the options and buzzwords, hopefully this post is enough to convince you to give it a shot.